Setting Up Custom Field Mapping
Before we can proceed with the mapping, we need to find out the corresponding field name in Sitecore. The field names generally looks like “Article Date” or “MetaDescription”.
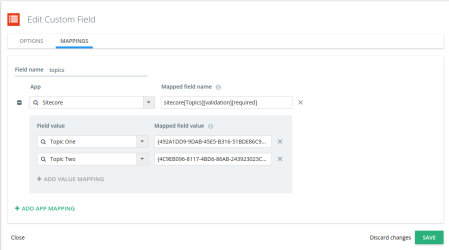
Kapost custom fields can be mapped to Sitecore fields by finding the desired custom field in Settings > Custom Fields > Edit and then click on the Mappings tab.
Let’s say that another one of our field names in Sitecore was MetaDescription, then the field name entered in the Mapped Field Name field in Kapost will be sitecore[MetaDescription].
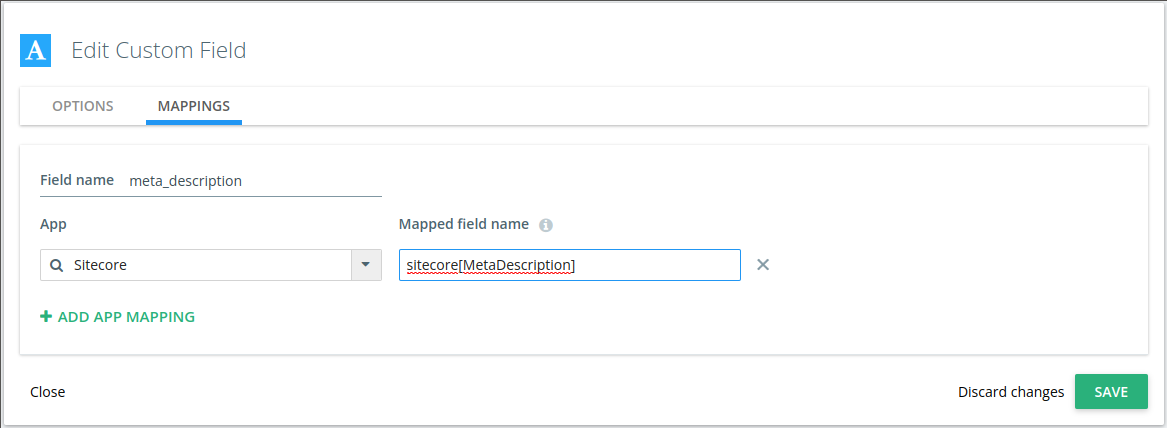
Tip: Notice how we just wrapped the field name we got from Sitecore inside sitecore[…]. This special syntax is necessary for the integration to recognize all the mapped fields during the publishing process.
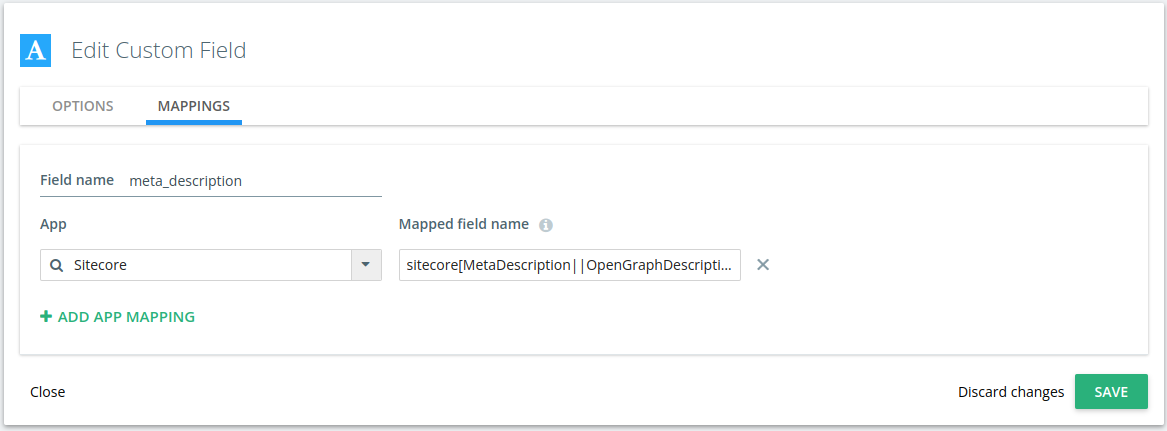
For instance, we wanted one Kapost field to map to more than one Sitecore field then we would simply separate the Sitecore field names with double pipes, ||. For e.g. sitecore[MetaDescription||OpenGraphDescription].
Custom fields can also have additional validation rules added to the field name. For e.g. sitecore[MetaDescription][validate][minlen:50;maxlen:150].
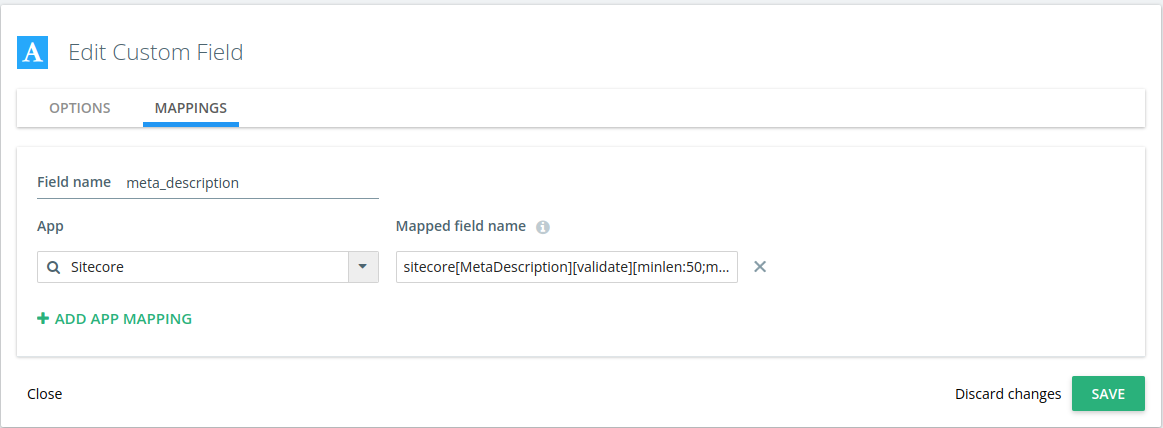
The validation rules added to the field name above will enforce that the value of the field is not less than 50 characters and not over 150 characters. We can also make a field value required and all characters within the value to be url safe, meaning that it can only contain alphanumeric characters, spaces, underscores and dashes. for e.g. sitecore[Title][validate][required;urlsafe].
These validation rules are simply added to the field name, and they are separated by semicolons as seen in the examples above. The validation rules are optional and should only be used where they make sense. For non-text custom fields, the only validation rule that makes sense is the “required” one.
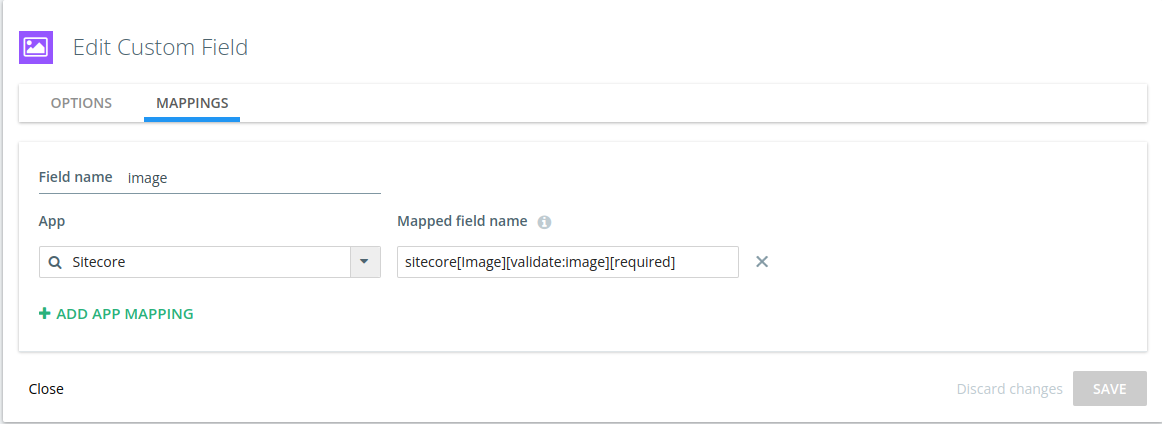
For image custom fields, when the required validation rule is to be set so the syntax changes a little bit and one must also include the type of the field, so the field name becomes: sitecore[Image][image:validate][required]. Similarly, for file custom fields, the field name becomes: sitecore[File][file:validate][required].
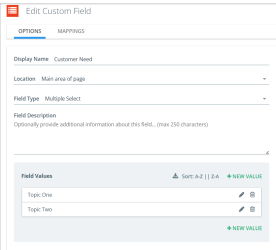
In addition, for Dropdown and Multi-select custom fields each individual value in Kapost must be mapped to their equivalent “Item ID” inside Sitecore.
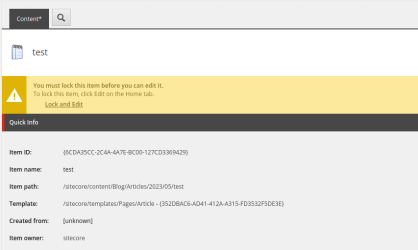
Once again, just like in the case of the Template ID, you need to find the respective Item in Sitecore and then copy their “Item ID”, including the braces.
In this case the “Item ID” we would use as the Mapped field value would be “{492A1DD9-9DAB-45E5-B316-51BDE86C98C6}”.
How to find the correct field names in Sitecore?
To find the field names, we need to look up the Sitecore Template which can be done by finding an existing content item in Sitecore and then clicking on the link to the Template, which will look something like this: “/sitecore/templates/Pages/Article”.
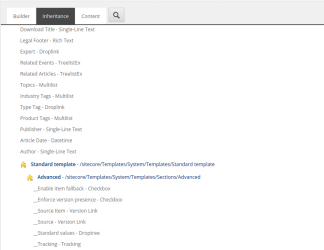
Once the template is open it is necessary to look at either the “Builder” or the “Inheritance” tab depending on how Sitecore has been setup. In the example below, you can see that there are many fields like Article Date, Topics, etc.
